Installing Pioneer AVH X2700 BS in Hyundai Sonata 2009
Well, I now have a Pioneer AVH X2700BS unit installed in my Hyundai Sonata. Pretty proud of it too. It took a while to get this unit going … and there were a lot of changes along the way.
At first I purchased a Pioneer AVH X2600BT from a local Best Buy. They had that unit on sale for $359. However they price-matched Amazon; so I bought that unit for $259. Necessary parts included a Hyundai wiring adapter and a double DIN mounting kit — which had to be ordered. So I waited. Four days later, I picked up the parts and went to have the unit installed.
Nasty surprise! The parts were ordered for a 2008 Hyundai Sonata. I have a 2009; and, no, they would not fit my car. I had to re-order and wait again.
While waiting, I started doing some research. Apple CarPlay looked interesting. But some end user reviews were not all that impressive. I also called Crutchfield and learned about one of Pioneer’s newest units, the AVH X2700BS series. Pioneer makes app called AppRadio Live that integrates features from your smart phone. The model I ordered seemed to work with this app — but you needed three different cables. The AVH X2700BS unit allow you to run the app with your original phone cable — one cable — whether Android or iPhone. At this point, I decided on getting the newest model. (Btw, I hear rumors that Apple’s latest iOS was seeded to developers last week, and the future looks bright for Apple’s CarPlay operating over Bluetooth instead running a cable through the lightning connector.)
The base price for the Pioneer AVH X2700BS unit was about $330 everywhere I went — but I found one seller on Amazon that offered it for $233. Seemed like a red flag at that price — but I decided to take that risk that it was a legit OEM Pioneer unit. It arrived two days later.
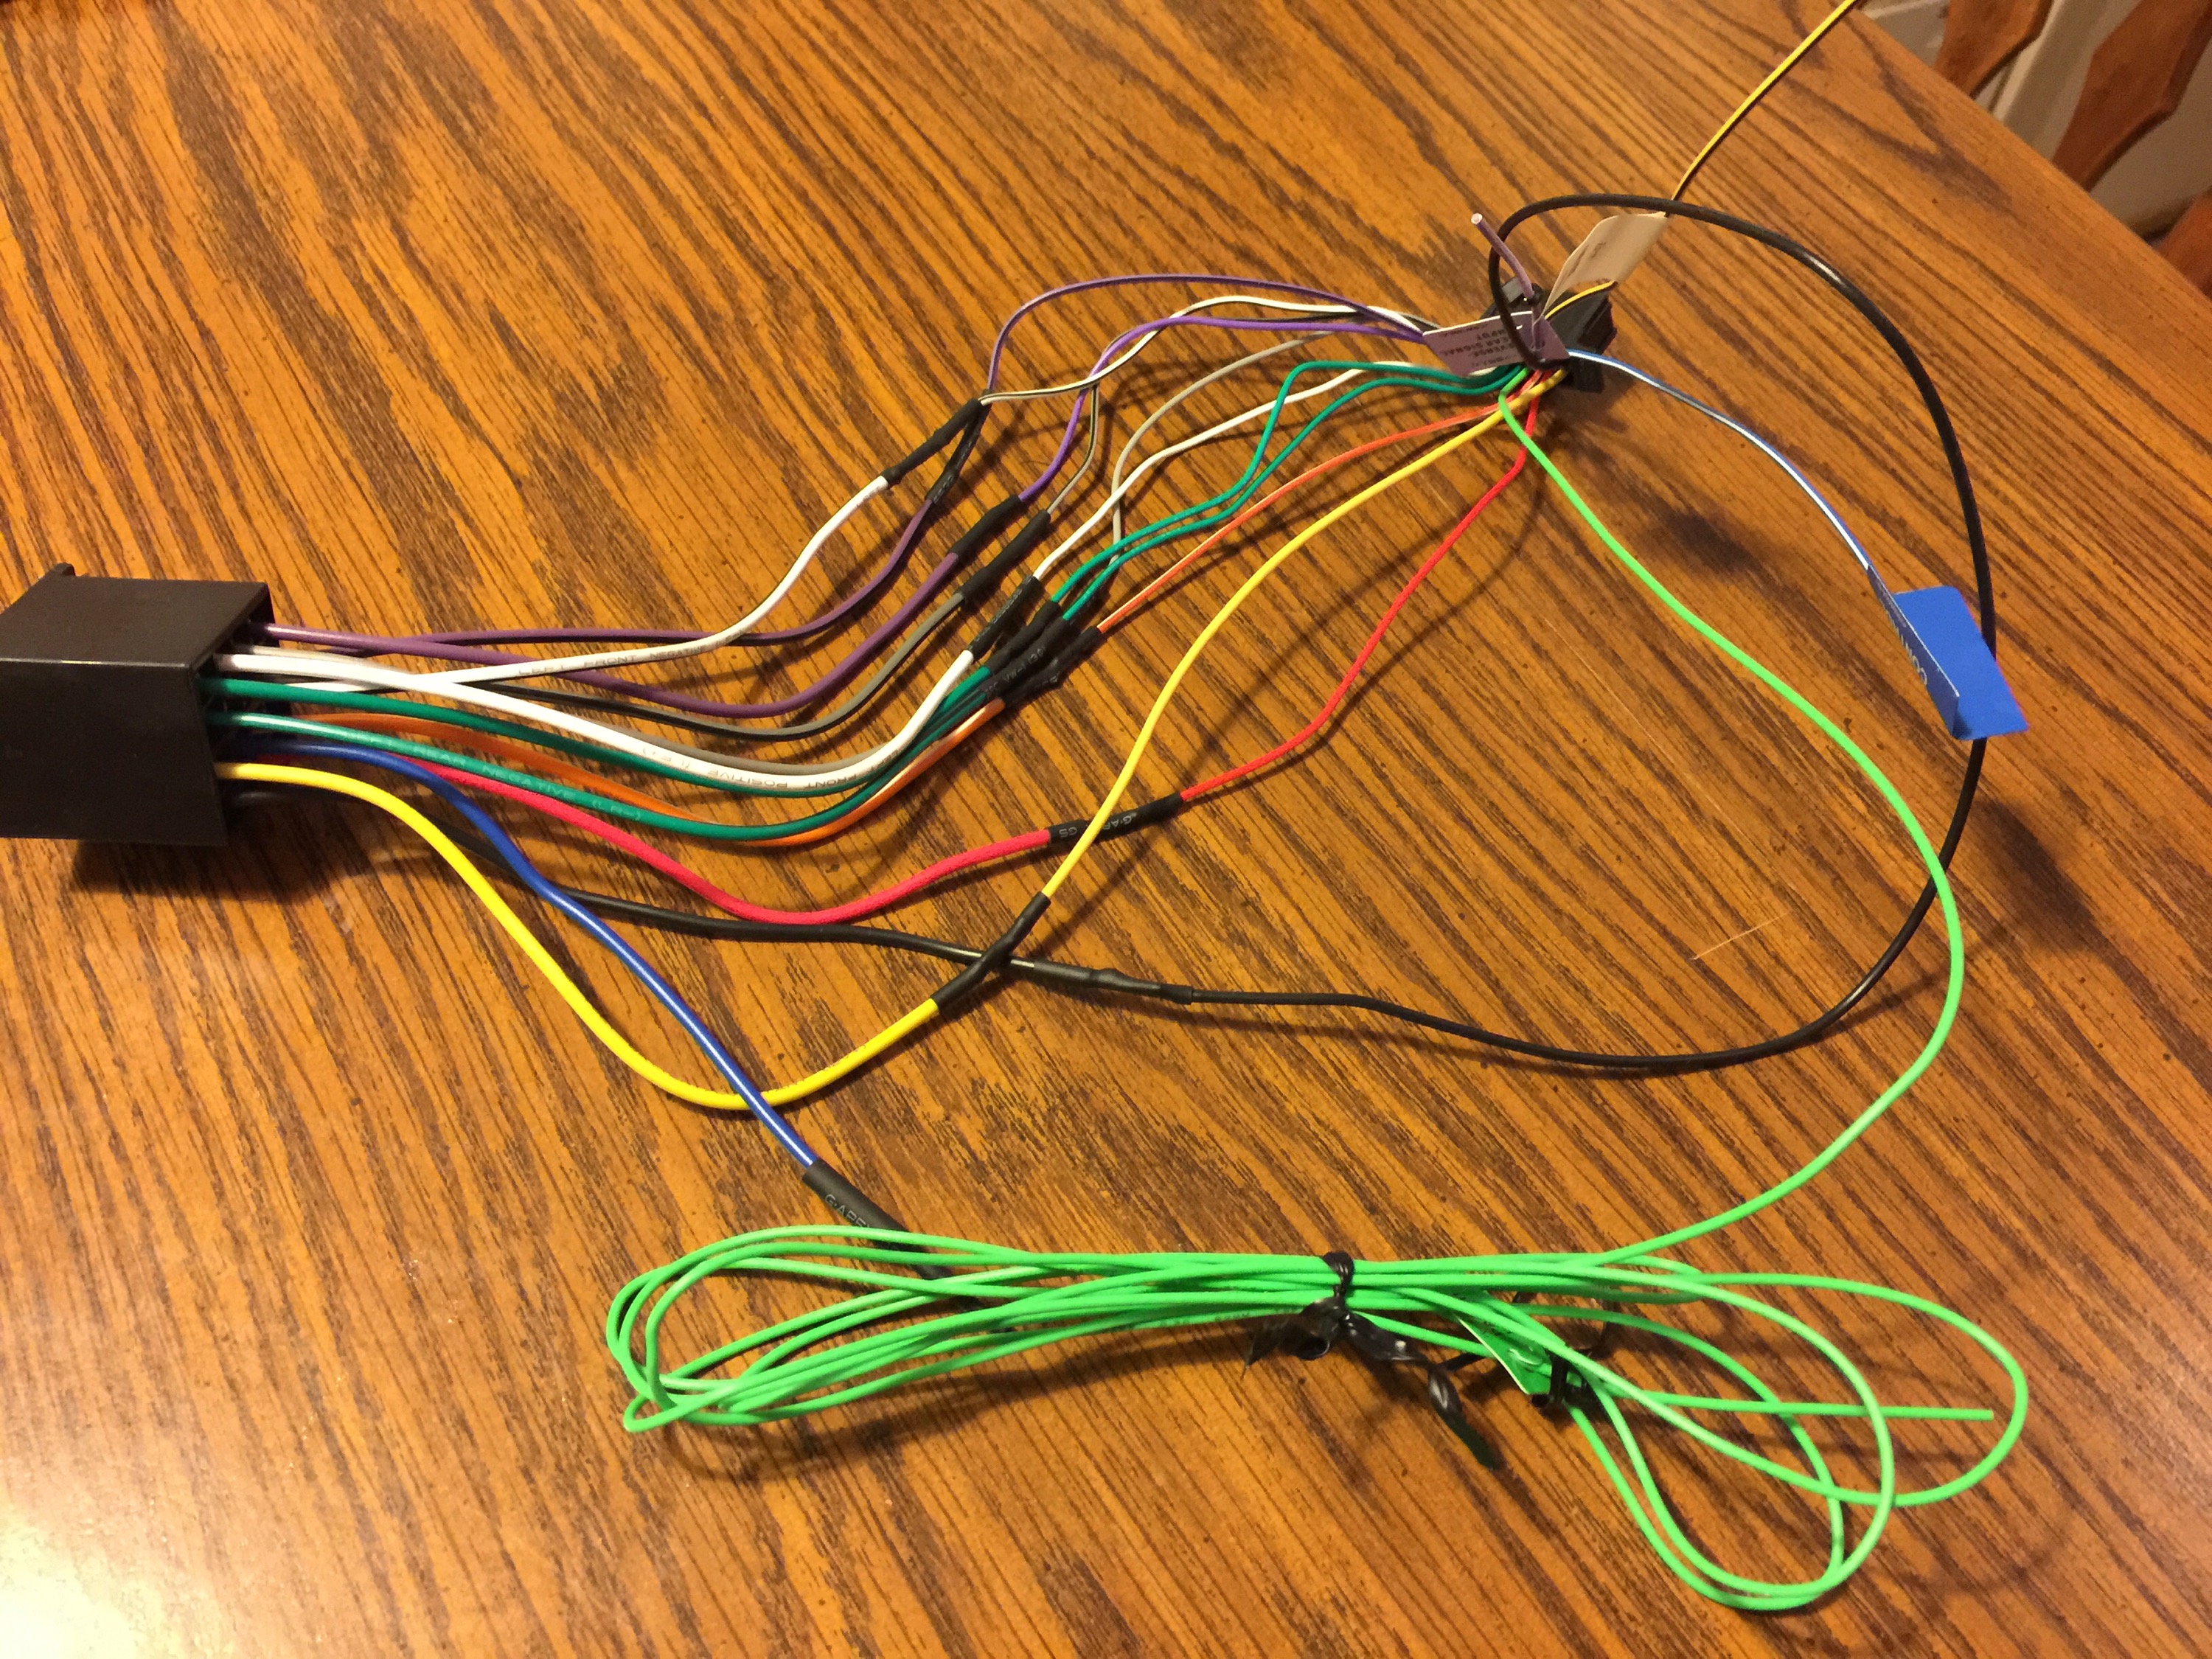
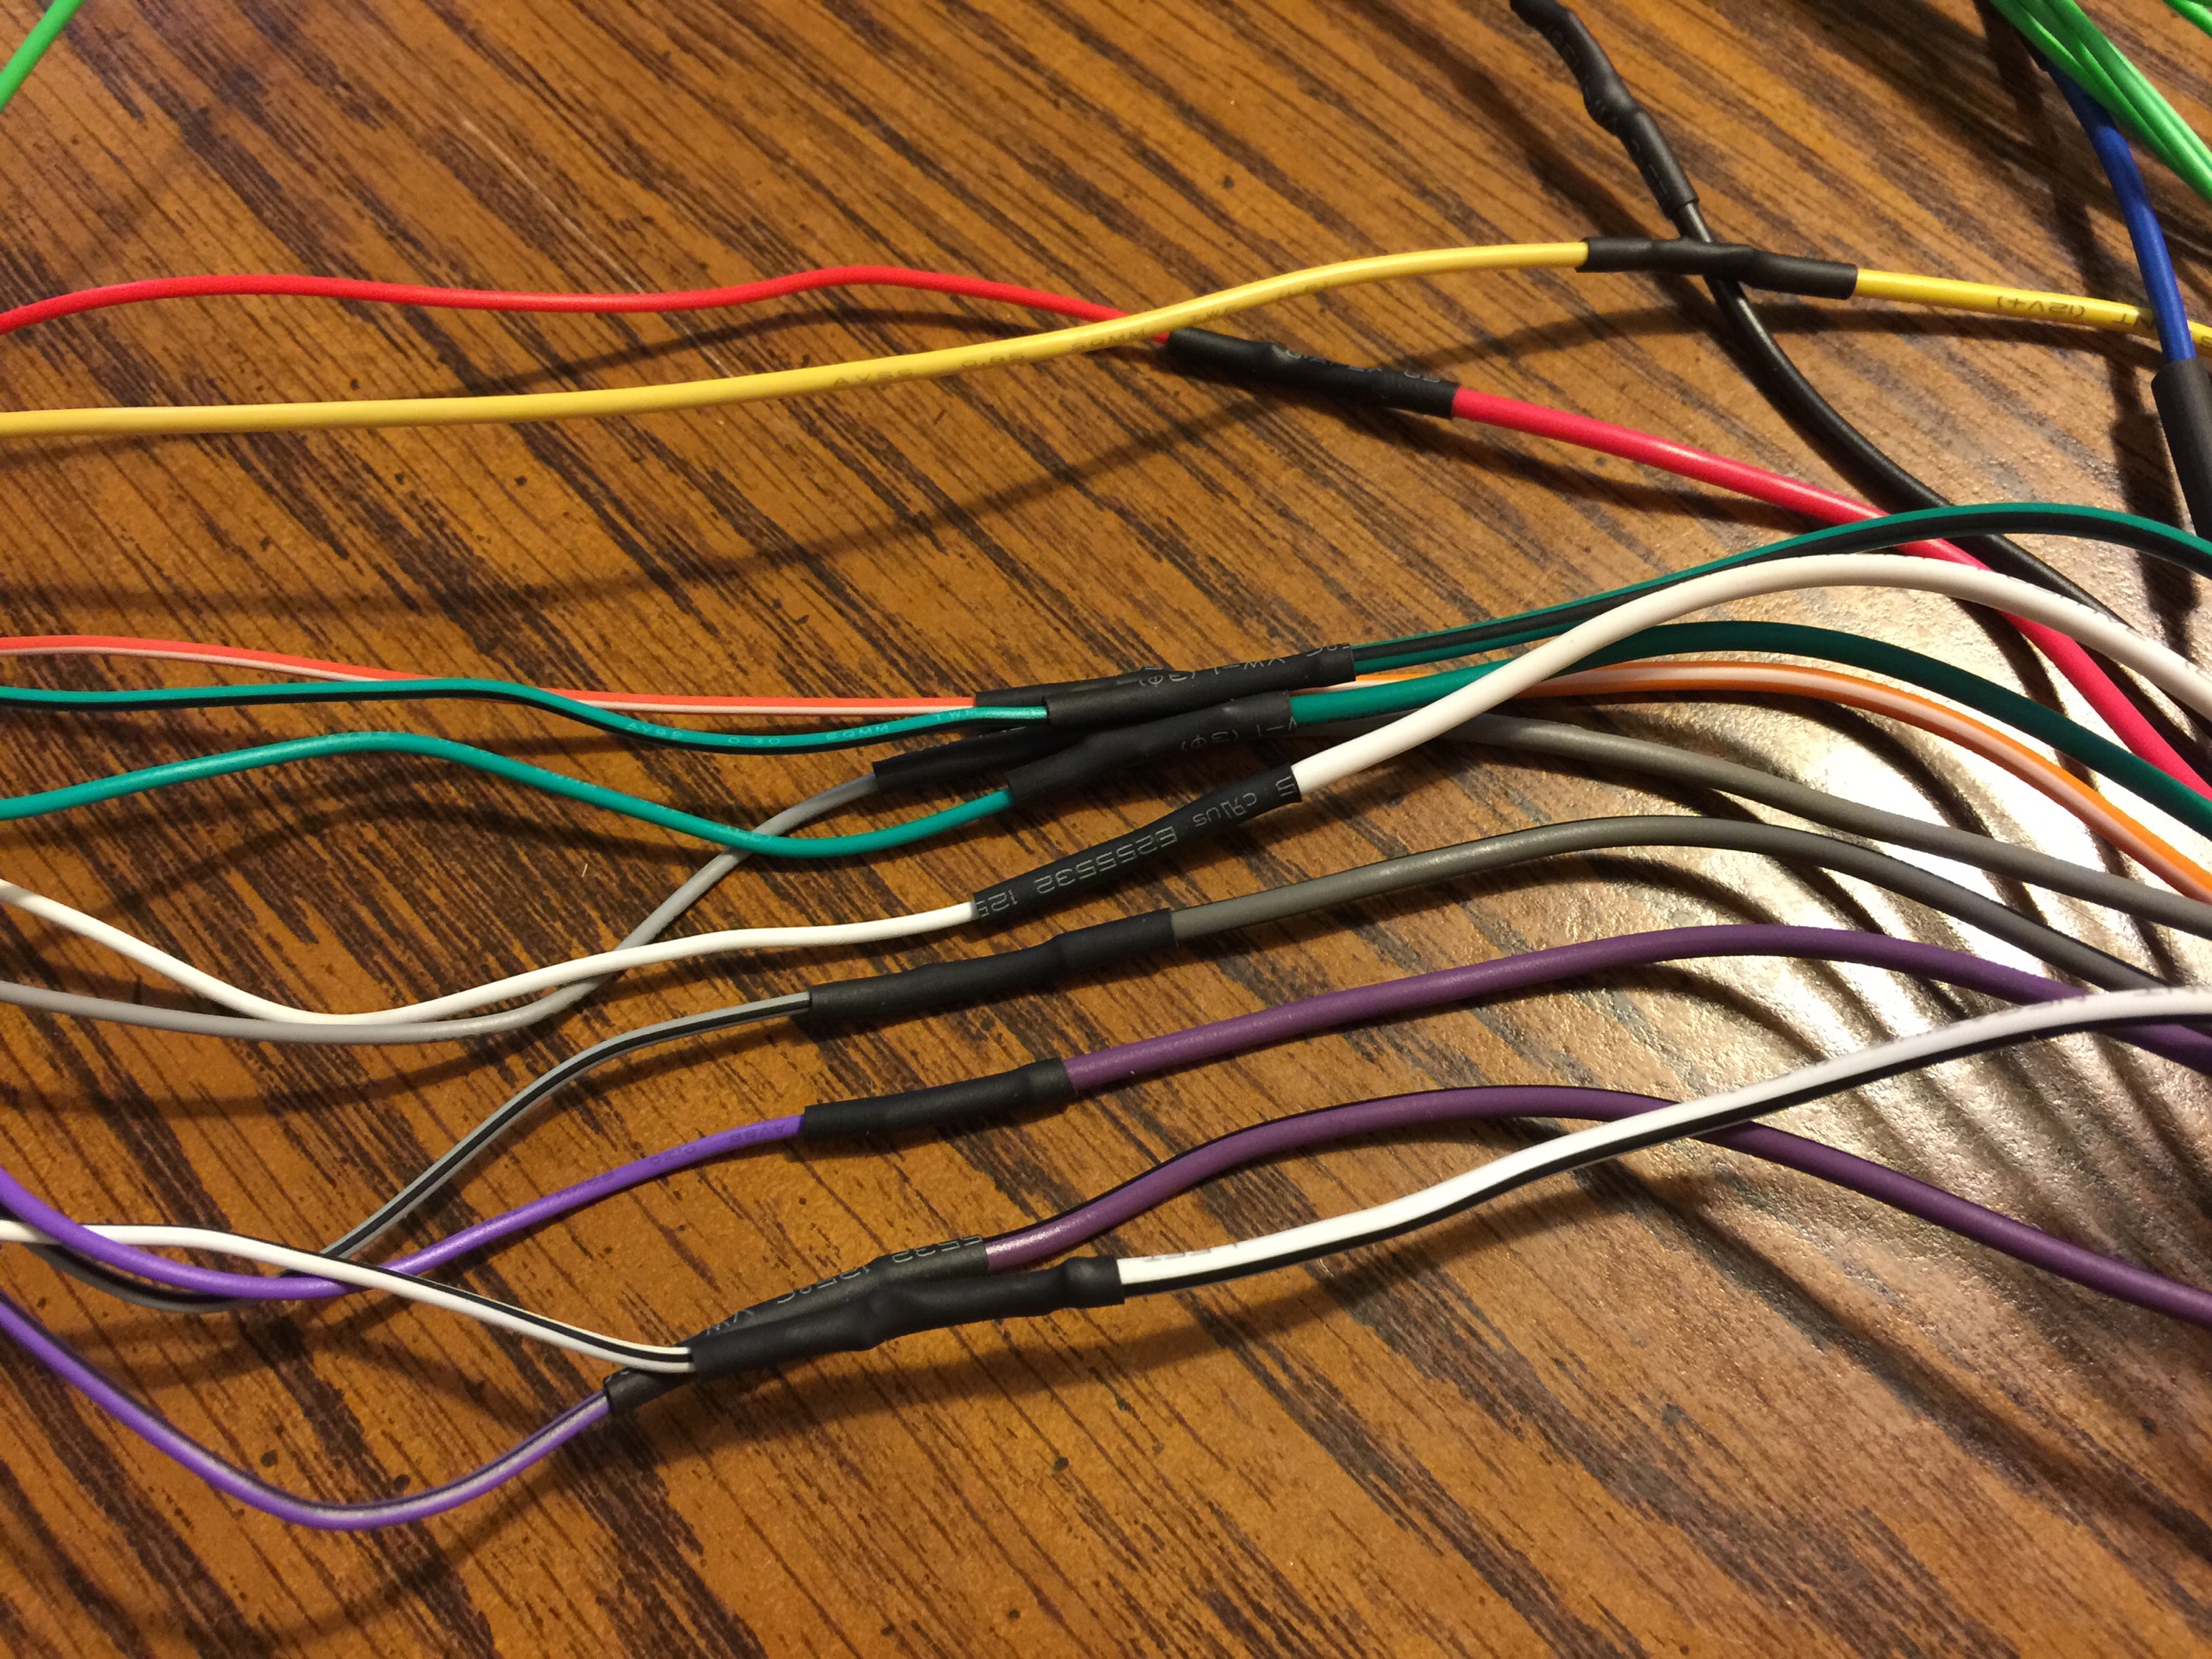
I watched a few YouTube videos and started to think that I could do a better job installing this unit myself — I like to solder the connections as opposed to crimping them with connectors. I went back and forth a few times in my mind as I could make an appointment and have the unit working Friday. I didn’t really have any time to install the unit until the weekend. Thursday, rolled around — and we went to a Valentine’s Day Dinner with our LifeGroup class. After we got home, around 8:30, I decided to solder the Pioneer wiring harness to the Metro Kia/Hyundai converter wiring harness. Typical perfection was self-required — employing all my NAVY micro-solder skills. Heat shrink was a must. I thought to myself, this will help the guy tomorrow at Best Buy a little — And it would be soldered connections for premium sound.
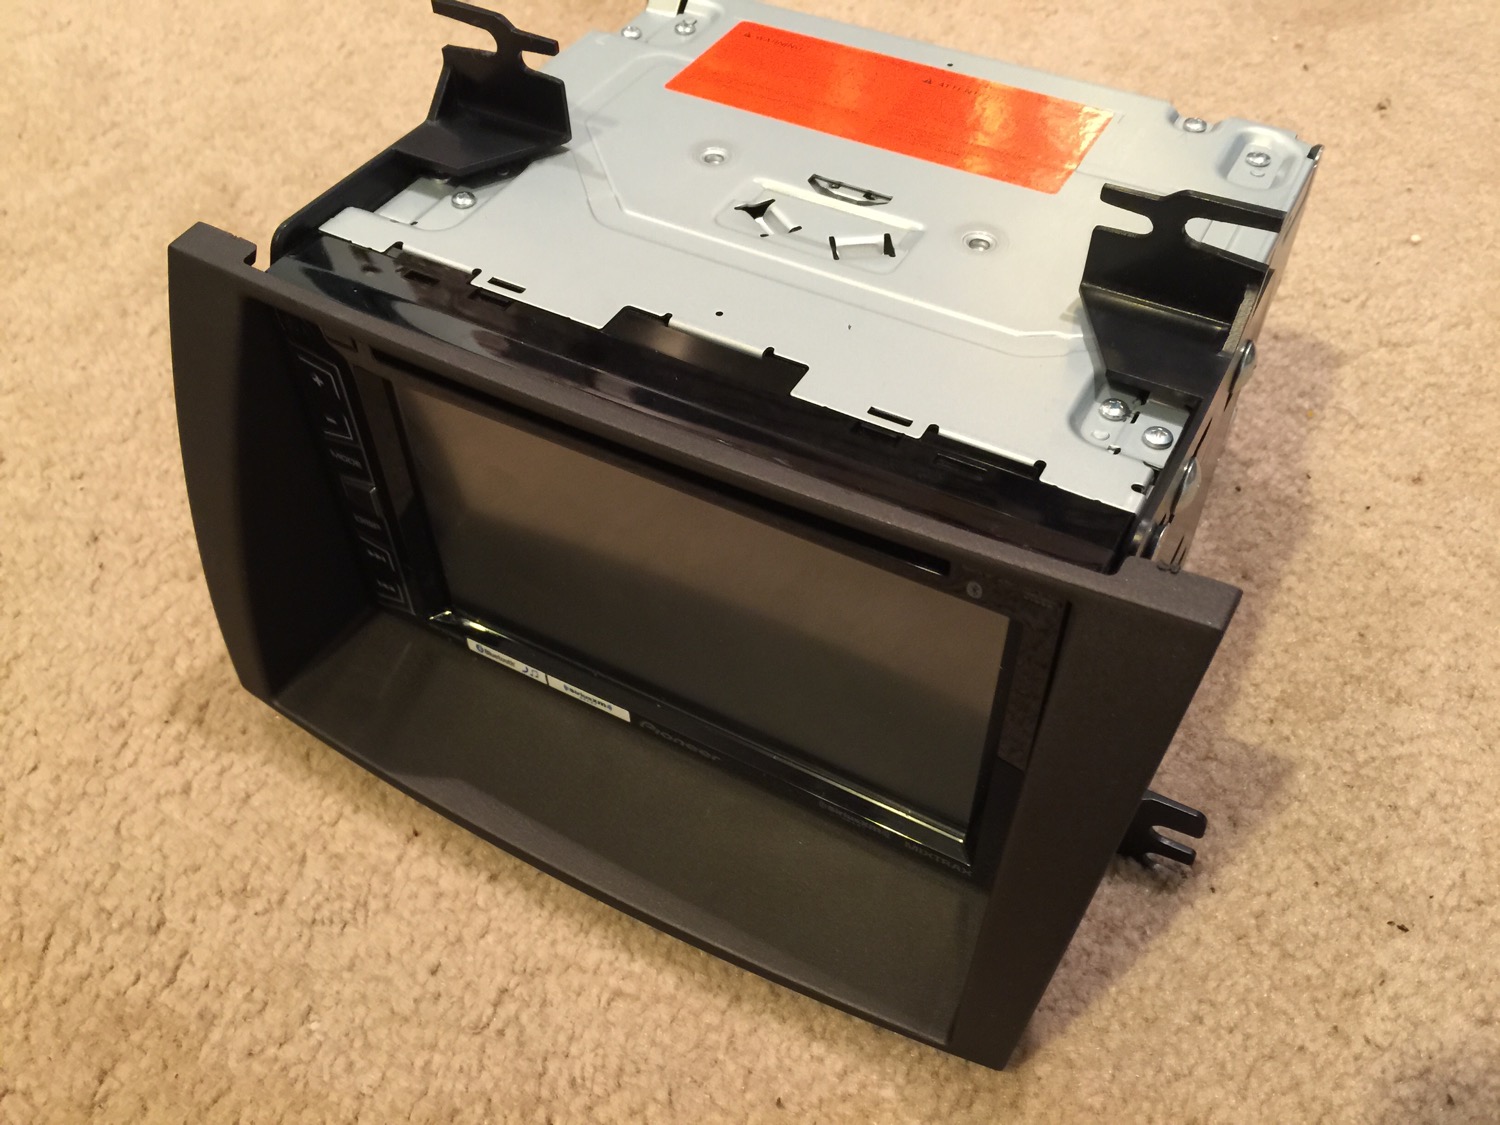
At this point I decided to do another simple step. I assembled the double DIN kit, and screwed the side brackets in place on the receiver unit.
Next, I thought about going to bed. It was about 1:00 am in the morning; but I thought I’d just take out the required dash elements after finding another instructional YouTube video. I didn’t have those kit tools for prying panel parts — so I used a plastic putty smoother. Once the dash panel was broken down, it was easy to remove the factory radio. I connected the factory wiring bracket to the Metro adapter wiring harness bracket.
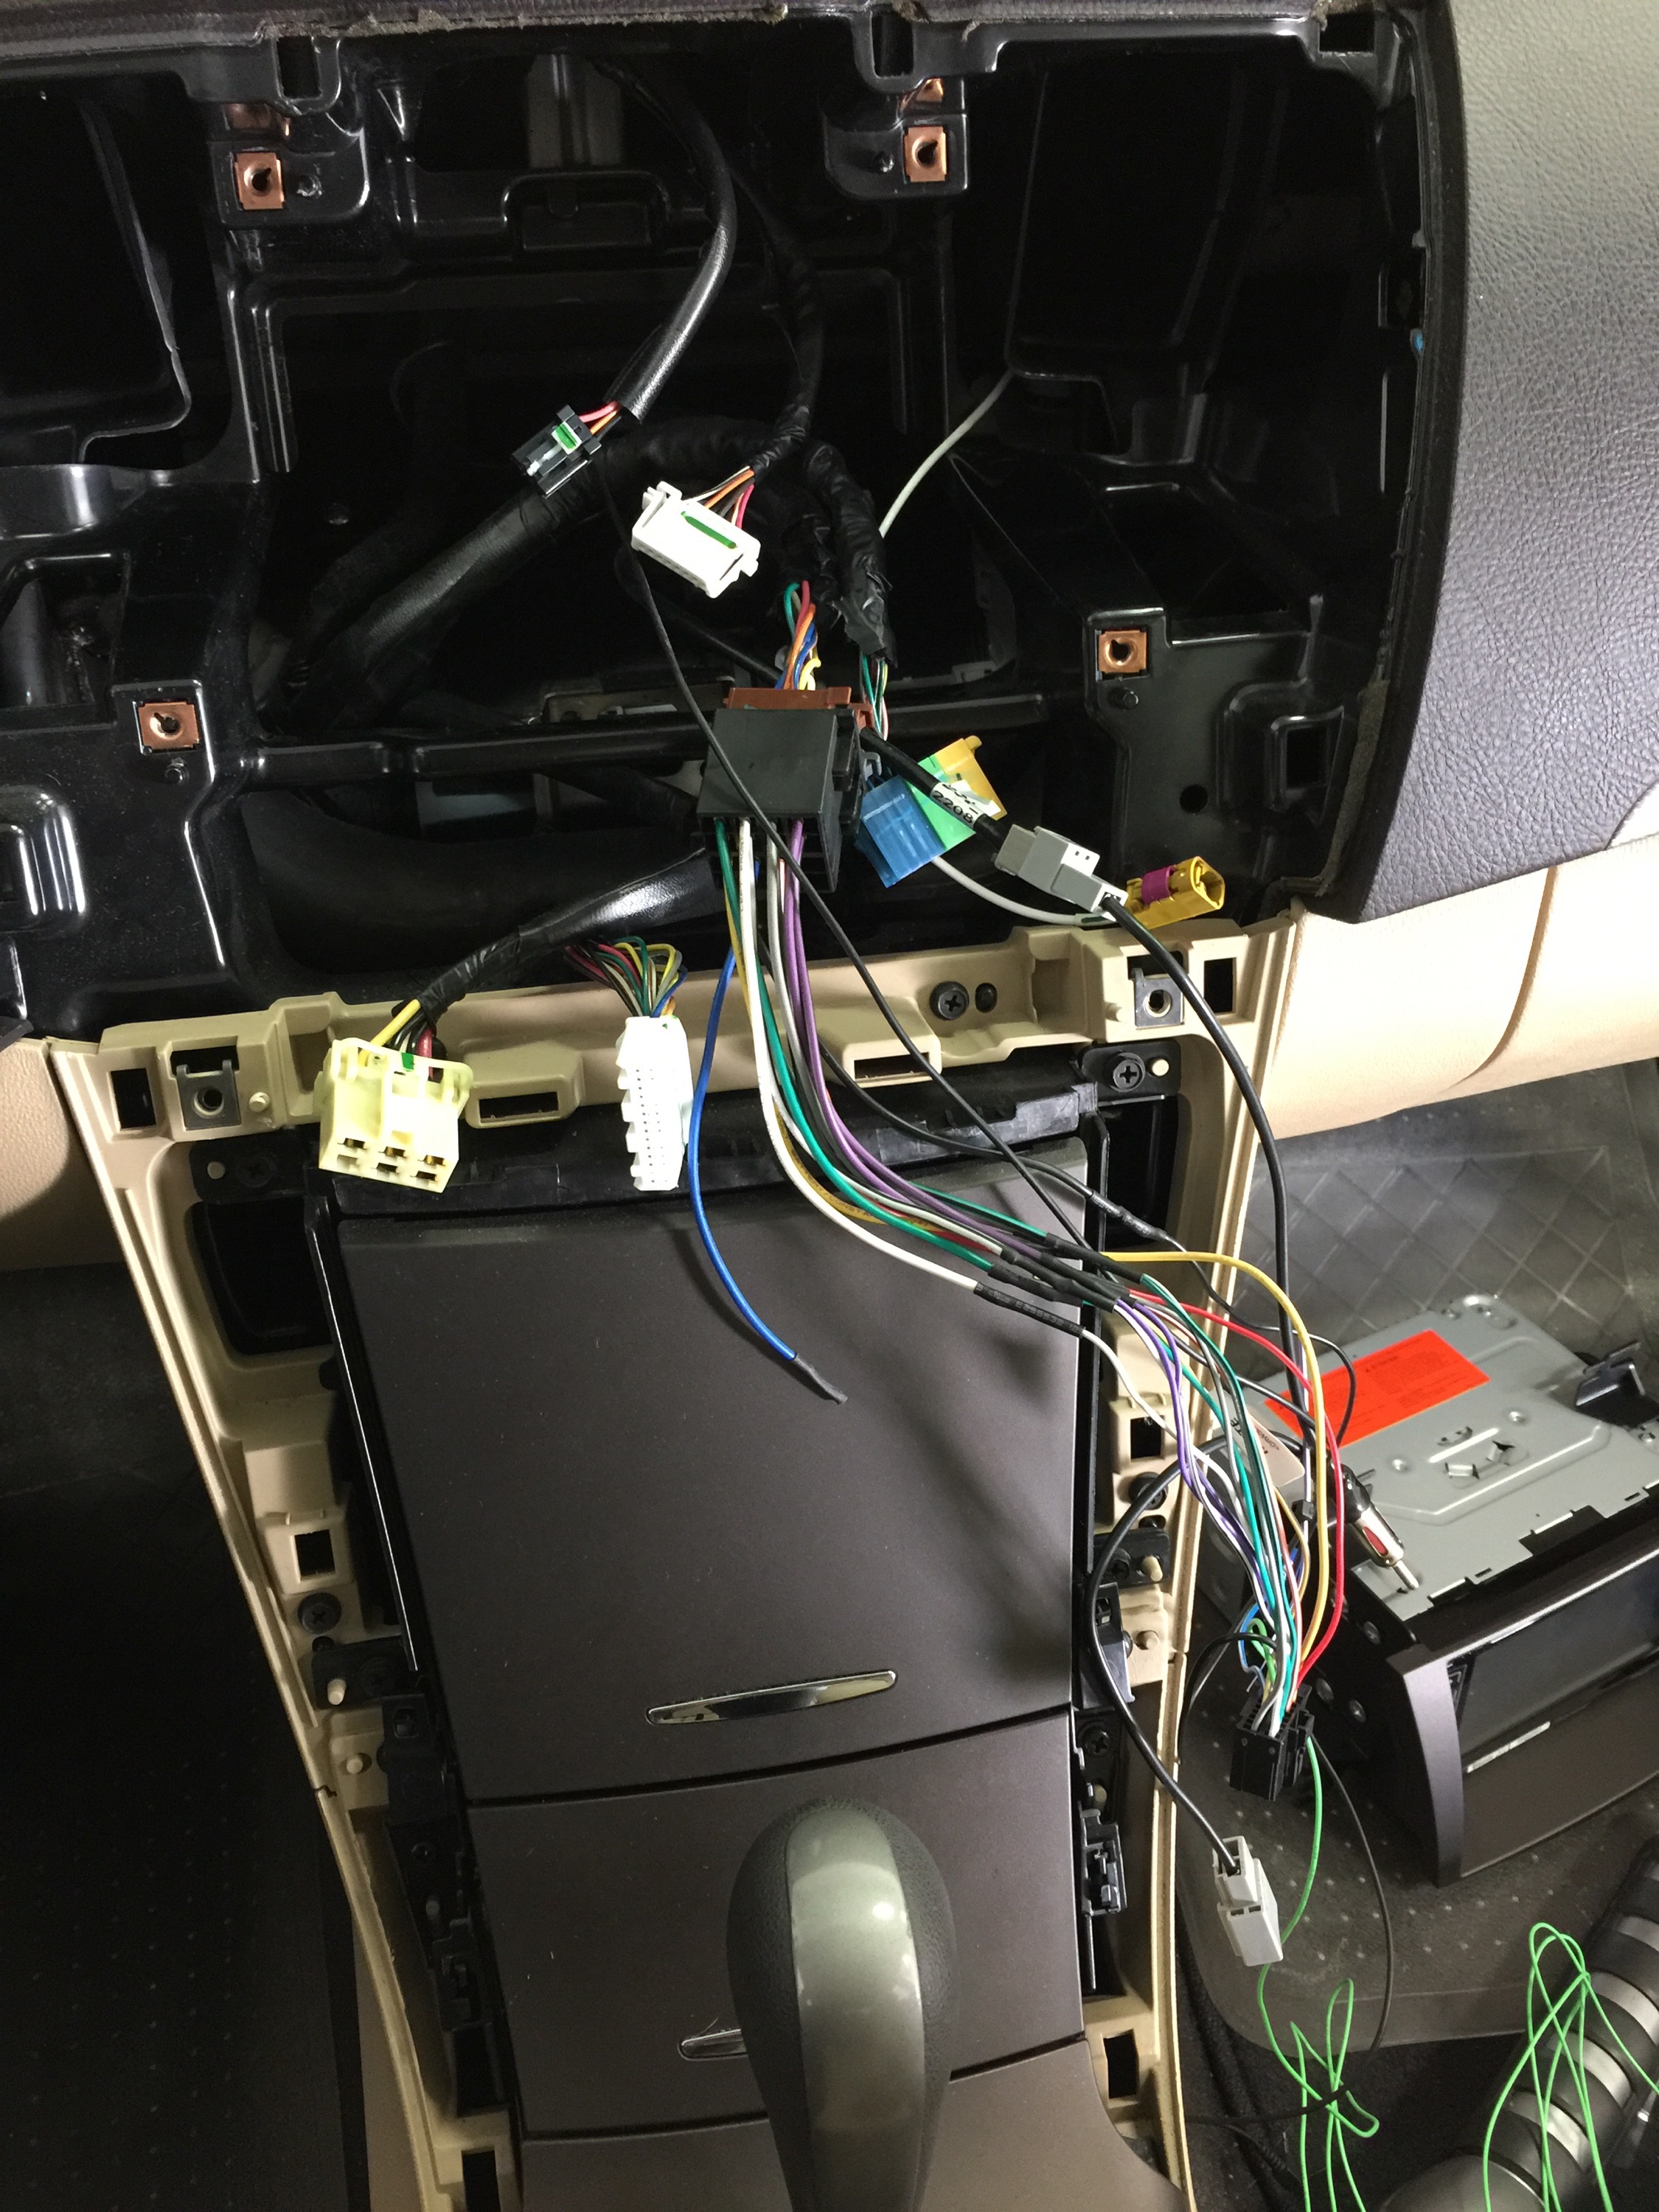
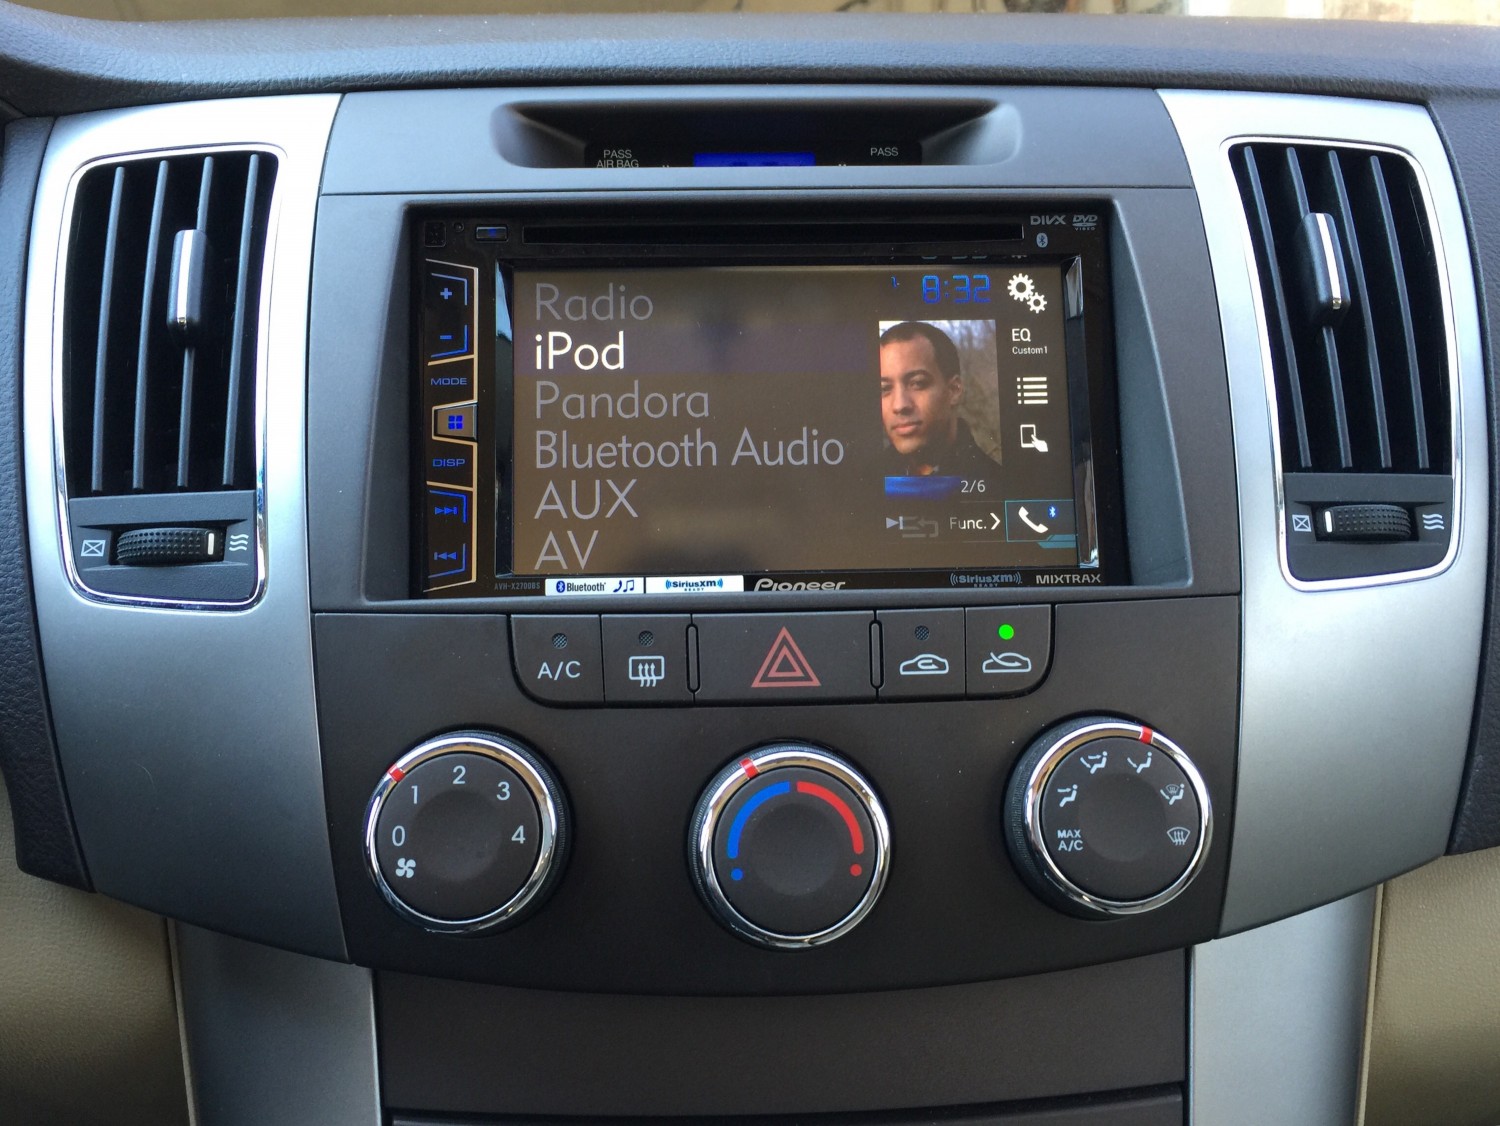
Even though I had an appointment at Best Buy, I couldn’t resist attaching the wiring brackets to the new unit. It wasn’t mounted or anything. In fact it required one hand to keep it balanced on the gear shifter. (There was a towel covering the gear shift handle to keep it from scratching.) But the unit was working fine. It paired with my iPhone 6 Plus just fine. I pulled up one of my a cappella songs. Wow! The sound was pure joy.
There were just two wires that were not connected at this point — the green brake wire, and a wire for the reverse signal.
Next came the task of mounting the microphone for the bluetooth. I found very little on the internet to assist with this task. And those SRB Airbag labels kind of scared me about trying to remove a windshield pillar. But it didn’t take long to figure out that you can actually tuck the wire in seams without removing anything. In fact, the main tool I used to do this was the wood part of a clothes hanger when taken apart. A popsicle stick would have been perfect, but I didn’t have one. But where to mount the microphone? Eventually I became convinced that it should be mounted overhead, between the reading lights/sunglass case assembly. After removing that piece, I found that a plastic bracket could easily pop out — the perfect spot.
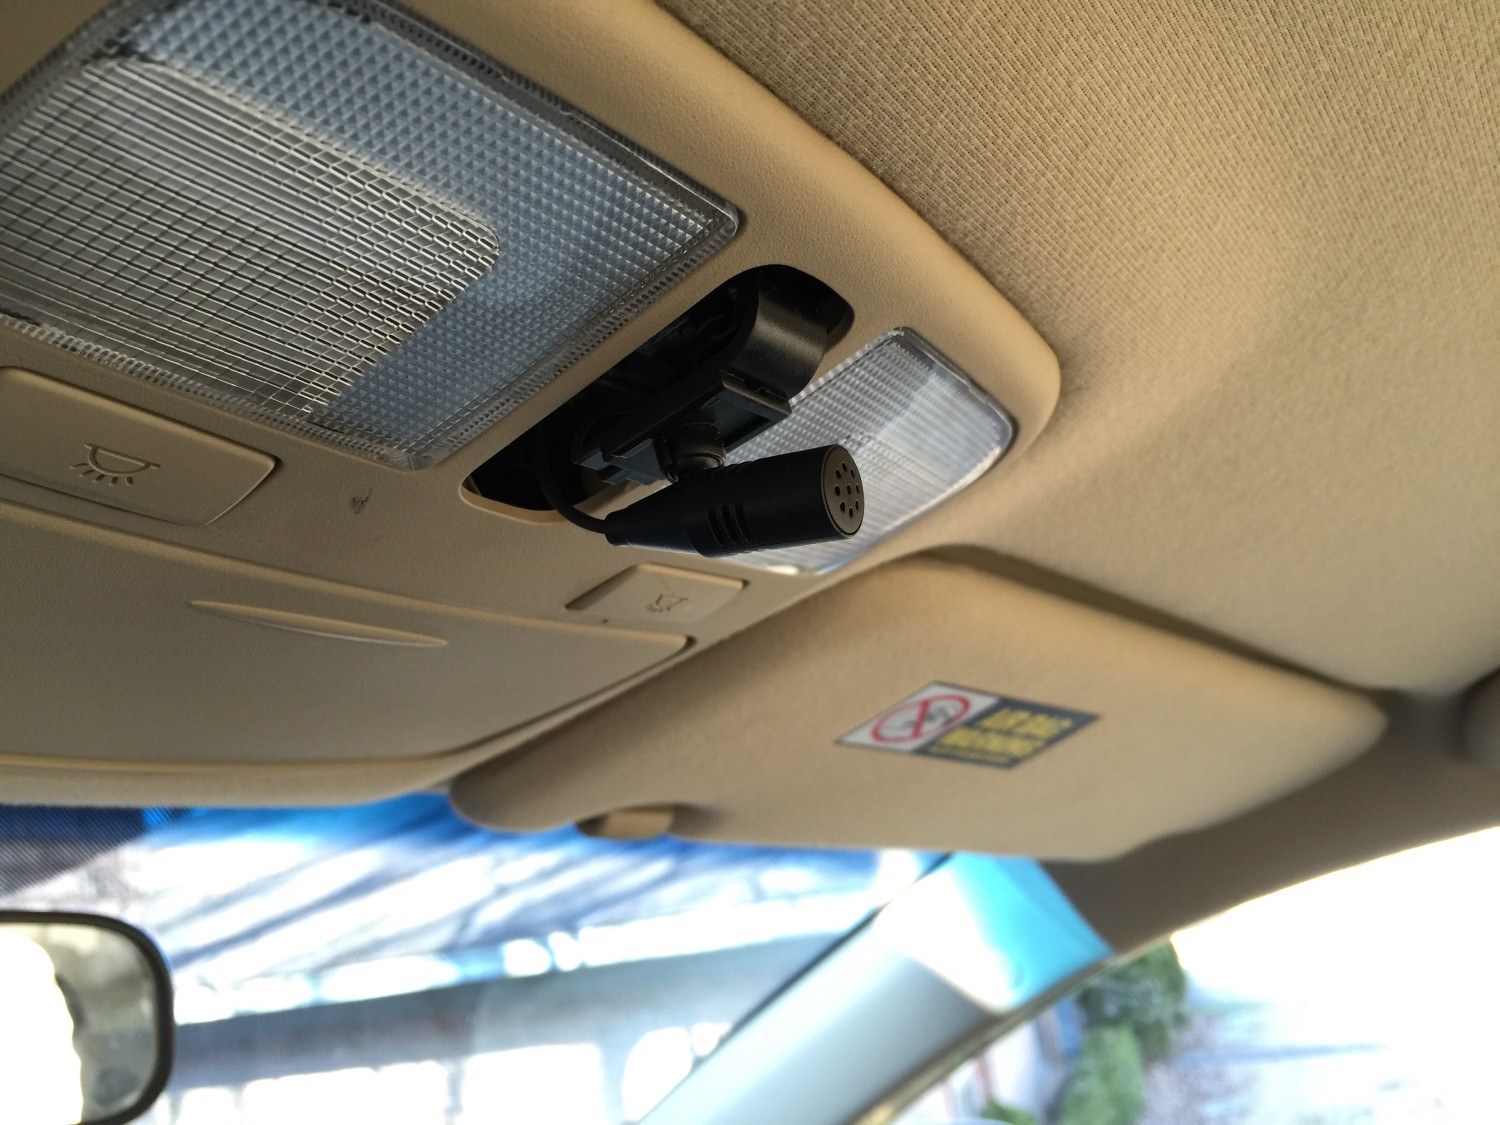
After mounting the mic, and running the wire down the drivers side windshield pillar, it was easy to plug the mic into it’s jack and test Siri from my iPhone 6 Plus. Flawless operation.
At this point, there were two wires that were not connected — the excessively long green emergency break wire, and a wire labeled remote. I believe the remote wire was simply an antenna for the remote control sold with the Pioneer unit. There was a second part that came with the Metro Hyundai adaptor kit; it contained a single blue wire with a white stripe. By standard color codes, this seems to be for an amplifier, or a powered antenna. Neither of these are used in my car.
Before I knew it, step by step, my receiver unit was installed.
I left the dash broken down for my installation appointment for the installation of the rear-view camera. There were a few things that I was uncertain of about that procedure. I’m sure I could have figured it out. But, I decided to go to bed. By now it was 2:00 am Friday morning. Derik, from Best Buy did a wonderful job — and even honored a request to route a USB phone connection cable to a compartment inside my console.
Update: I am getting used to this radio — and I think it’s a fantastic unit for the amount of money I paid — but I am finding some glitches here and there. This morning for example, I started out with a Bluetooth connection streaming an AFR podcast for most of my ride into work. Then I decided to connect the lightning connector and switch to AppRadio Mode. I started the AppRadio Live app from my iPhone, and tried to play a song. By the time bar, and the PLAY/PAUSE indicator — it was playing — but there was no sound. I manually paused and played — still no sound. I even switched to another song, rebooted the iPhone — toggled settings — still not sound. I had to turn my ignition off when I arrived, and restart the car before it would play sound. Not sure what caused that.
For now, I’m thinking I will keep things simple and do Bluetooth only. I’ll probably only use the AppRadio Mode for GPS Navigation when I need that.
Update: At some point I will write an article about my upgrade. I upgraded this unit by returning it to Amazon and purchasing a Pioneer AVH-4000NEX instead. The visual notifications with badges in CarPlay help to be more aware of incoming text messages.
It was nice that the power connector is the same, so no additional wiring changes were necessary. Installation consisted of unplugging existing wires and swapping out head units.
Hi Walt,
Thanks a lot for posting this. I was trying to figure out where to put my mic as well and this helps a lot.
Jacob
Good deal Jacob …
Hope everything works out fantastic for you …
🙂
Were you able to get your aux/usb port in the to work?
Yes, Jacob, I was able to get it working … I ran cables for that and other things …
I see, Did you have to splice the wires on them? I have the appradio 3 and it seems that there are no connections for the aux/usb ports.
Thank you for responding. I appreciate it.
Hummmm … my unit had multiple USB ports, I did read that I needed to use USB port number one, (not two on my unit) to work. I even got the phone display to work as well, but it required more cables than it was worth dealing with.
I guess, since were using different models it will be different. Anyway, I think I will be able to figure it out. I hope…
Thanks again!
Hey Richard, I know it’s been a while but were you able to use controls on the steering wheel to change song and volume on the aftermarket unit you installed ?
thanks
Max
It has been a while, and I’ve sold that car. Seems like I was not able to do that … but I can’t remember for certain … or provide any details. Been too long to remember. Sorry.
All right thanks anyway !
am I able to put a Carplay bluetooth sterio in a 2009 sonata ?
Greetings Bailey … I would assume there are units that would fit, but I do not know that right off hand for sure. I’d have to refer to googling research. Crutchfield may be able to help. This article was writing so long ago … I do not even have that car anymore.
Good luck